Python 實現(xiàn)任意區(qū)域文字識別(OCR)操作
本文的OCR當然不是自己從頭開發(fā)的,是基于百度智能云提供的API(我感覺是百度在中國的人工智能領(lǐng)域值得稱贊的一大貢獻),其提供的API完全可以滿足個人使用,相對來說簡潔準確率高。
安裝OCR Python SDKOCR Python SDK目錄結(jié)構(gòu)
├── README.md├── aip //SDK目錄│ ├── __init__.py //導(dǎo)出類│ ├── base.py //aip基類│ ├── http.py //http請求│ └── ocr.py //OCR└── setup.py //setuptools安裝
支持Python版本:2.7.+ ,3.+
安裝使用Python SDK有如下方式:
如果已安裝pip,執(zhí)行pip install baidu-aip即可。
如果已安裝setuptools,下載后執(zhí)行python setup.py install即可。
代碼實現(xiàn)下面讓我們來看一下代碼實現(xiàn)。
主要使用的模塊有
import os # 操作系統(tǒng)相關(guān)import sys # 系統(tǒng)相關(guān)import time # 時間獲取import signal # 系統(tǒng)信號import winsound # 提示音from aip import AipOcr # 百度OCR APIfrom PIL import ImageGrab # 捕獲剪切板中的圖片import win32clipboard as wc # WINDOWS 剪切板操作import win32con # 這里用于獲取 WINDOWS 剪貼板數(shù)據(jù)的標準格式
第一步 這里的APP_ID,API_KEY,SECRET_KEY是通過登陸百度智能云后自己在OCR板塊申請的, 實現(xiàn)基本的OCR程序,可以通過圖片獲取文字。
''' 你的 APPID AK SK '''APP_ID = ’xxx’API_KEY = ’xxx’SECRET_KEY = ’xxx’client = AipOcr(APP_ID, API_KEY, SECRET_KEY)''' 讀取圖片 '''def get_file_content(filePath): with open(filePath, ’rb’) as fp: return fp.read()''' 從API的返回字典中獲取文字 '''def getOcrText(txt_dict): txt = '' if type(txt_dict) == dict: for i in txt_dict[’words_result’]: txt = txt + i['words'] if len(i['words']) < 25: # 這里使用字符串長度決定了文本是否換行,讀者可以根據(jù)自己的喜好控制回車符的輸出,實現(xiàn)可控的文本顯示形式 txt = txt + 'nn' return txt''' 調(diào)用通用/高精度文字識別, 圖片參數(shù)為本地圖片 '''def BaiduOcr(imageName,Accurate=True): image = get_file_content(imageName) if Accurate: return getOcrText(client.basicGeneral(image)) else: return getOcrText(client.basicAccurate(image)) ''' 帶參數(shù)調(diào)用通用文字識別, 圖片參數(shù)為遠程url圖片 '''def BaiduOcrUrl(url): return getOcrText(client.basicGeneralUrl(url))
第二步,實現(xiàn)快捷鍵獲取文字,將識別文字放入剪切板中,提示音提醒以及快捷鍵退出程序
''' 剪切板操作函數(shù) '''def get_clipboard(): wc.OpenClipboard() txt = wc.GetClipboardData(win32con.CF_UNICODETEXT) wc.CloseClipboard() return txtdef empty_clipboard(): wc.OpenClipboard() wc.EmptyClipboard() wc.CloseClipboard()def set_clipboard(txt): wc.OpenClipboard() wc.EmptyClipboard() wc.SetClipboardData(win32con.CF_UNICODETEXT, txt) wc.CloseClipboard() ''' 截圖后,調(diào)用通用/高精度文字識別'''def BaiduOcrScreenshots(Accurate=True,path='./',ifauto=False): if not os.path.exists(path): os.makedirs(path) image = ImageGrab.grabclipboard() if image != None: print('rThe image has been obtained. Please wait a moment!',end=' ') filename = str(time.time_ns()) image.save(path+filename+'.png') if Accurate: txt = getOcrText(client.basicAccurate(get_file_content(path+filename+'.png'))) else: txt = getOcrText(client.basicGeneral(get_file_content(path+filename+'.png'))) os.remove(path+filename+'.png') # f = open(os.path.abspath(path)+''+filename+'.txt',’w’) # f.write(txt) set_clipboard(txt) winsound.PlaySound(’SystemAsterisk’,winsound.SND_ASYNC) # os.startfile(os.path.abspath(path)+''+filename+'.txt') # empty_clipboard() return txt else : if not ifauto: print('Please get the screenshots by Shift+Win+S! ',end='') return '' else: print('rPlease get the screenshots by Shift+Win+S ! ',end='')def sig_handler(signum, frame): sys.exit(0) def removeTempFile(file = ['.txt','.png'],path='./'): if not os.path.exists(path): os.makedirs(path) pathDir = os.listdir(path) for i in pathDir: for j in file: if j in i: os.remove(path+i)def AutoOcrFile(path='./',filetype=['.png','.jpg','.bmp']): if not os.path.exists(path): os.makedirs(path) pathDir = os.listdir(path) for i in pathDir: for j in filetype: if j in i: f = open(os.path.abspath(path)+''+str(time.time_ns())+'.txt',’w’) f.write(BaiduOcr(path+i)) breakdef AutoOcrScreenshots(): signal.signal(signal.SIGINT, sig_handler) signal.signal(signal.SIGTERM, sig_handler) print('Waiting For Ctrl+C to exit ater removing all picture files and txt files!') print('Please get the screenshots by Shift+Win+S !',end='') while(1): try: BaiduOcrScreenshots(ifauto=True) time.sleep(0.1) except SystemExit: removeTempFile() break else : pass finally: pass
最終運行函數(shù) AutoOcrScreenshots 函數(shù)便可以實現(xiàn)了:
if __name__ == ’__main__’: AutoOcrScreenshots()使用方法
使用 Windows 10 系統(tǒng)時,將以上代碼放置在一個 .py 文件下,然后運行便可以使用Shift+Win+S快捷鍵實現(xiàn)任意區(qū)域截取,截取后圖片將暫時存放在剪切板中,程序自動使用Windows API獲取圖片內(nèi)容,之后使用百度的OCR API獲取文字,并將文字放置在剪切版內(nèi)存中后發(fā)出提示音。
使用者則可以在開啟程序后,使用快捷鍵截圖后靜待提示音后使用Ctrl+V將文字內(nèi)容放置在自己所需的位置。
補充:Python 中文OCR
有個需求,需要從一張圖片中識別出中文,通過python來實現(xiàn),這種這么高大上的黑科技我們普通人自然搞不了,去github找了一個似乎能滿足需求的開源庫-tesseract-ocr:
Tesseract的OCR引擎目前已作為開源項目發(fā)布在Google Project,其項目主頁在這里查看https://github.com/tesseract-ocr,
它支持中文OCR,并提供了一個命令行工具。python中對應(yīng)的包是pytesseract. 通過這個工具我們可以識別圖片上的文字。
筆者的開發(fā)環(huán)境如下:
macosx
python 3.6
brew
安裝tesseract
brew install tesseract
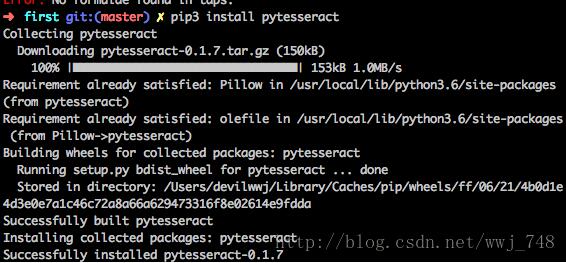
安裝python對應(yīng)的包:pytesseract
pip install pytesseract
怎么用?
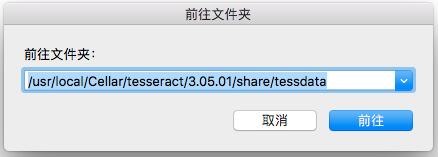
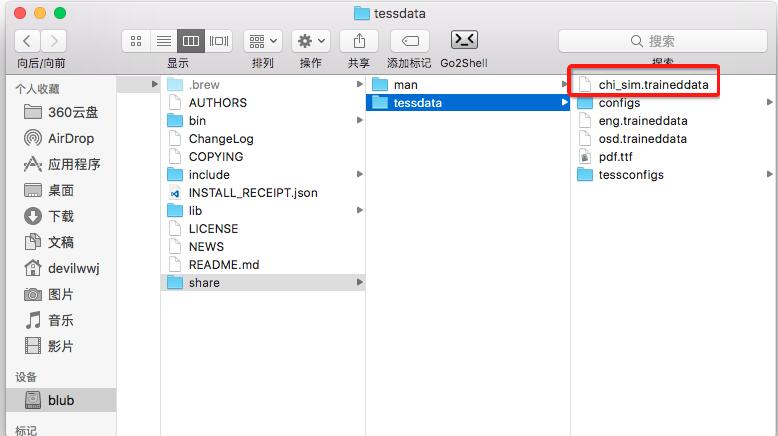
如果要識別中文需要下載對應(yīng)的訓(xùn)練集:https://github.com/tesseract-ocr/tessdata,下載”chi_sim.traineddata”,然后copy到訓(xùn)練數(shù)據(jù)集的存放路徑,如:
具體代碼就幾行:
#!/usr/bin/env python3# -*- coding: utf-8 -*-import pytesseractfrom PIL import Image# open imageimage = Image.open(’test.png’)code = pytesseract.image_to_string(image, lang=’chi_sim’)print(code)
OCR速度比較慢,大家可以拿一張包含中文的圖片試驗一下。
以上為個人經(jīng)驗,希望能給大家一個參考,也希望大家多多支持好吧啦網(wǎng)。如有錯誤或未考慮完全的地方,望不吝賜教。
相關(guān)文章:
1. python實現(xiàn)讀取類別頻數(shù)數(shù)據(jù)畫水平條形圖案例2. python中PyQuery庫用法分享3. python操作數(shù)據(jù)庫獲取結(jié)果之fetchone和fetchall的區(qū)別說明4. Ajax實現(xiàn)頁面無刷新留言效果5. php5.6不能擴展redis.so的解決方法6. JSP+Servlet實現(xiàn)文件上傳到服務(wù)器功能7. 阿里前端開發(fā)中的規(guī)范要求8. 關(guān)于HTML5的img標簽9. CSS3實現(xiàn)動態(tài)翻牌效果 仿百度貼吧3D翻牌一次動畫特效10. PHP獲取時間戳等相關(guān)函數(shù)匯總
 網(wǎng)公網(wǎng)安備